|
これは、プログラムhttp://docs.zkoss.org/wiki/Use_Load-On-Demand_to_Handle_Huge_Dataで書かれたアーティクルのZKGrailsへのポートです。
.このチュートリアルは ZKGrails 0.7.1 およびそれ以降を使用します。
これは NetBeans 上で実行するように修正されたものです。オリジナル: Chanwit Kaewkasi
Grailsプロジェクトを NetBeans で 作成しする前に、Grails で使用しているアプリケーションサーバー Jetty についての
不都合と、それに対応するノウハウを紹介します。このブログを参考にしてください。
「Java VisualVM と TASKKILLを使ってJettyを停止する。」
Grailsプロジェクトの準備:
まず最初にGrails1.1.1を入手して、Windowsにインストールします。
次に ツール > オプション > その他 > Grooby で

Grails のホーム に先にインストールしたGrails1.1.1のインストール先を指定します。

コマンドラインベース: $ grails create-app ondemand
の所は NetBeans
においては ファイル > 新規プロジェクト> Groovy > Grails アプリケーション > 次へ をクリック
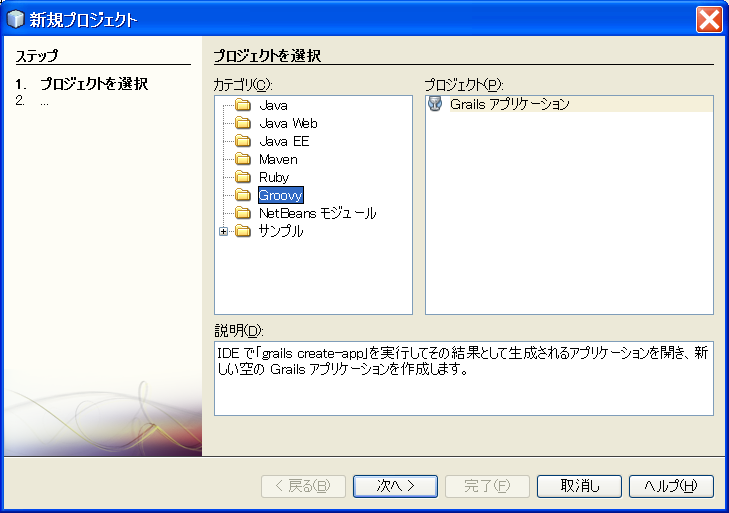
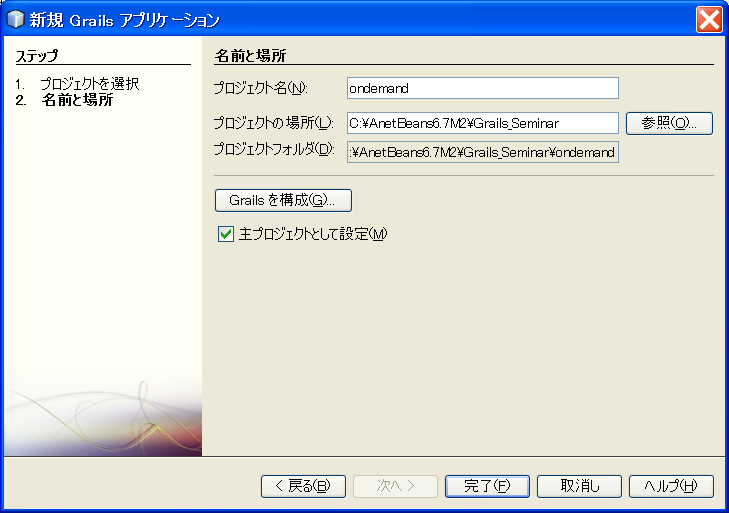
プロジェクト名 に"ondemand" と入力 > 完了 の手順でGrailsプロジェクトを作成します。
NetBeans の 出力エリアには次のログが見えます。
出力 - <new project>(create-app)
Welcome to Grails 1.1.1 - http://grails.org/
Licensed under Apache Standard License 2.0
Grails home is set to: C:\grails-1.1.1
Base Directory: C:\AnetBeans6.7M2\Grails_Seminar
Running script C:\grails-1.1.1\scripts\CreateApp_.groovy
Environment set to development
Setting non-interactive mode
[mkdir] Created dir: C:\AnetBeans6.7M2\Grails_Seminar\ondemand\src
[mkdir] Created dir: C:\AnetBeans6.7M2\Grails_Seminar\ondemand\src\java
[mkdir] Created dir: C:\AnetBeans6.7M2\Grails_Seminar\ondemand\src\groovy
[mkdir] Created dir: C:\AnetBeans6.7M2\Grails_Seminar\ondemand\grails-app
[mkdir] Created dir: C:\AnetBeans6.7M2\Grails_Seminar\ondemand\grails-app\controllers
[mkdir] Created dir: C:\AnetBeans6.7M2\Grails_Seminar\ondemand\grails-app\services
[mkdir] Created dir: C:\AnetBeans6.7M2\Grails_Seminar\ondemand\grails-app\domain
[mkdir] Created dir: C:\AnetBeans6.7M2\Grails_Seminar\ondemand\grails-app\taglib
[mkdir] Created dir: C:\AnetBeans6.7M2\Grails_Seminar\ondemand\grails-app\utils
[mkdir] Created dir: C:\AnetBeans6.7M2\Grails_Seminar\ondemand\grails-app\views
[mkdir] Created dir: C:\AnetBeans6.7M2\Grails_Seminar\ondemand\grails-app\views\layouts
[mkdir] Created dir: C:\AnetBeans6.7M2\Grails_Seminar\ondemand\grails-app\i18n
[mkdir] Created dir: C:\AnetBeans6.7M2\Grails_Seminar\ondemand\grails-app\conf
[mkdir] Created dir: C:\AnetBeans6.7M2\Grails_Seminar\ondemand\test
[mkdir] Created dir: C:\AnetBeans6.7M2\Grails_Seminar\ondemand\test\unit
[mkdir] Created dir: C:\AnetBeans6.7M2\Grails_Seminar\ondemand\test\integration
[mkdir] Created dir: C:\AnetBeans6.7M2\Grails_Seminar\ondemand\scripts
[mkdir] Created dir: C:\AnetBeans6.7M2\Grails_Seminar\ondemand\web-app
[mkdir] Created dir: C:\AnetBeans6.7M2\Grails_Seminar\ondemand\web-app\js
[mkdir] Created dir: C:\AnetBeans6.7M2\Grails_Seminar\ondemand\web-app\css
[mkdir] Created dir: C:\AnetBeans6.7M2\Grails_Seminar\ondemand\web-app\images
[mkdir] Created dir: C:\AnetBeans6.7M2\Grails_Seminar\ondemand\web-app\META-INF
[mkdir] Created dir: C:\AnetBeans6.7M2\Grails_Seminar\ondemand\lib
[mkdir] Created dir: C:\AnetBeans6.7M2\Grails_Seminar\ondemand\grails-app\conf\spring
[mkdir] Created dir: C:\AnetBeans6.7M2\Grails_Seminar\ondemand\grails-app\conf\hibernate
[propertyfile] Creating new property file: C:\AnetBeans6.7M2\Grails_Seminar\ondemand\application.properties
[copy] Copying 1 resource to C:\AnetBeans6.7M2\Grails_Seminar\ondemand
[unjar] Expanding: C:\AnetBeans6.7M2\Grails_Seminar\ondemand\grails-shared-files.jar into C:\AnetBeans6.7M2\Grails_Seminar\ondemand
[delete] Deleting: C:\AnetBeans6.7M2\Grails_Seminar\ondemand\grails-shared-files.jar
[copy] Copying 1 resource to C:\AnetBeans6.7M2\Grails_Seminar\ondemand
[unjar] Expanding: C:\AnetBeans6.7M2\Grails_Seminar\ondemand\grails-app-files.jar into C:\AnetBeans6.7M2\Grails_Seminar\ondemand
[delete] Deleting: C:\AnetBeans6.7M2\Grails_Seminar\ondemand\grails-app-files.jar
[move] Moving 1 file to C:\AnetBeans6.7M2\Grails_Seminar\ondemand
[move] Moving 1 file to C:\AnetBeans6.7M2\Grails_Seminar\ondemand
[move] Moving 1 file to C:\AnetBeans6.7M2\Grails_Seminar\ondemand
Installing plug-in hibernate-1.1.1
[mkdir] Created dir: C:\Documents and Settings\training1\.grails\1.1.1\projects\ondemand\plugins\hibernate-1.1.1
[unzip] Expanding: C:\Documents and Settings\training1\.grails\1.1.1\plugins\grails-hibernate-1.1.1.zip into C:\Documents and Settings\training1\.grails\1.1.1\projects\ondemand\plugins\hibernate-1.1.1
Executing hibernate-1.1.1 plugin post-install script ...
Plugin hibernate-1.1.1 installed
Created Grails Application at C:\AnetBeans6.7M2\Grails_Seminar/ondemand
|
NetBeans 上のプロジェクトは次のように見えます。

次に、 ZKGrailsをインストールする必要があります。
最新のバージョンを自動的にインストールするには、次のように入力します:
$ grails install-plugin zk
の所は NetBeans
においては
プロジェクト ondemand にフォーカスを当てる >右クリック> Grails コマンドを実行 までカーソル移動
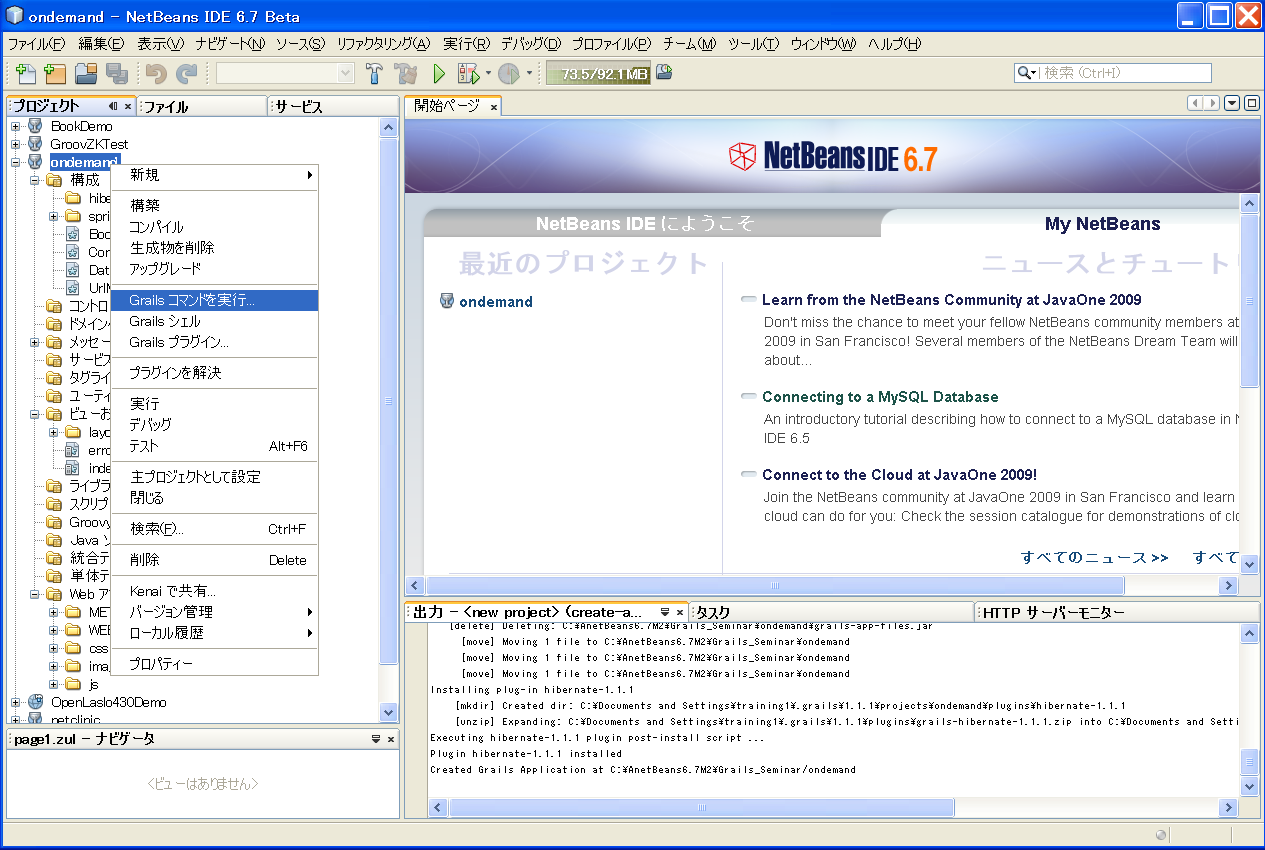
Grails コマンドを実行 でマウスクリック
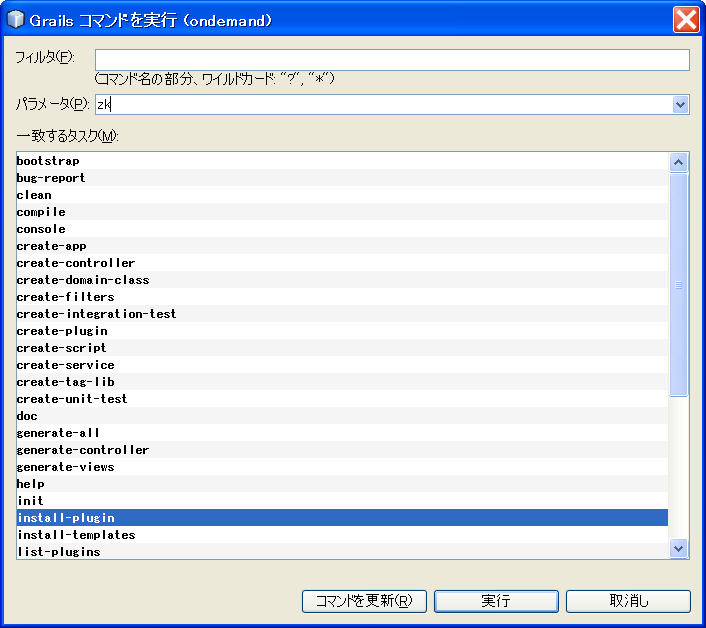
カーソルを install-plugin まで持って行き、パラメータ(P) フィールドに zk と入力して実行ボタンを押します。
NetBeans の 出力エリアには次のログが見えます。
出力 - ondemand (install-plugin)
Welcome to Grails 1.1.1 - http://grails.org/
Licensed under Apache Standard License 2.0
Grails home is set to: C:\grails-1.1.1
Base Directory: C:\AnetBeans6.7M2\Grails_Seminar\ondemand
Running script C:\grails-1.1.1\scripts\InstallPlugin.groovy
Environment set to development
Reading remote plugin list ...
Reading remote plugin list ...
Plugin list out-of-date, retrieving..
[delete] Deleting: C:\Documents and Settings\training1\.grails\1.1.1\plugins-list-default.xml
[get] Getting: http://plugins.grails.org/.plugin-meta/plugins-list.xml
[get] To: C:\Documents and Settings\training1\.grails\1.1.1\plugins-list-default.xml
..............................................
[get] last modified = Mon Jun 01 08:16:36 JST 2009
[get] Getting: http://plugins.grails.org/grails-zk/tags/RELEASE_0_7_2/grails-zk-0.7.2.zip
[get] To: C:\Documents and Settings\training1\.grails\1.1.1\plugins\grails-zk-0.7.2.zip
.......................................................................................................................................................................................................................................................................................................................................................................................................................................................................................................................................................................................................................................................................................................................................................................................................................................................
[get] last modified = Sat May 30 01:46:05 JST 2009
[copy] Copying 1 file to C:\Documents and Settings\training1\.grails\1.1.1\projects\ondemand\plugins
Installing plug-in zk-0.7.2
[mkdir] Created dir: C:\Documents and Settings\training1\.grails\1.1.1\projects\ondemand\plugins\zk-0.7.2
[unzip] Expanding: C:\Documents and Settings\training1\.grails\1.1.1\plugins\grails-zk-0.7.2.zip into C:\Documents and Settings\training1\.grails\1.1.1\projects\ondemand\plugins\zk-0.7.2
Executing zk-0.7.2 plugin post-install script ...
[copy] Copying 1 file to C:\AnetBeans6.7M2\Grails_Seminar\ondemand\web-app\WEB-INF
Plugin zk-0.7.2 installed
Plug-in provides the following new scripts:
------------------------------------------
grails create-composer
grails create-facade
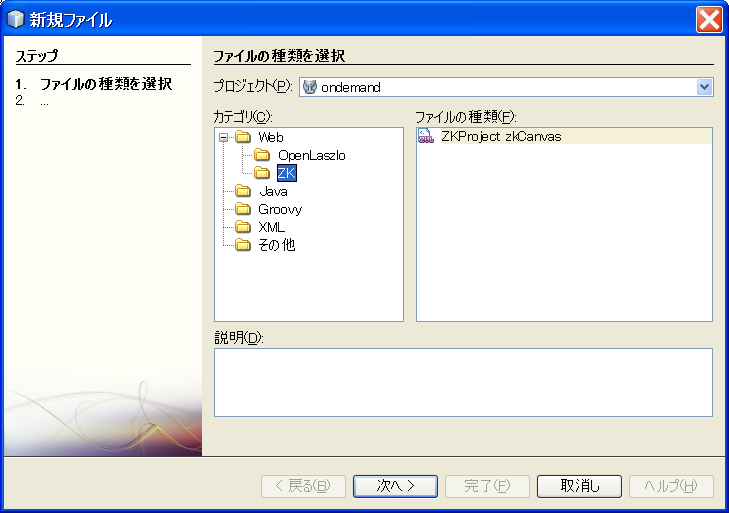
grails create-zul
|
ここでプラグインが反映されていることを確認
もう一度、プロジェクト ondemand にフォーカスを当てる >右クリック> Grails コマンドを実行>マウスクリック
の操作で ondemand プロジェクトが持つコマンドリストを確認します。
前回の操作で、次の3つのコマンド(grails create-composer,
grails create-facade,
grails create-zul)
が追加されているはずですが、
追加されていなければ、
コマンドを更新(R)ボタンを押します。

シンプルなドメインクラスのEmployeeを使用してデモプログラムを作成します。
Grailsのドメインクラスを作成するには、ドメインを作成するには、 クラス名を使用して以下の様にcreate-domain-classコマンドを使用します:
$ grails create-domain-class employee
の所は NetBeans
においては
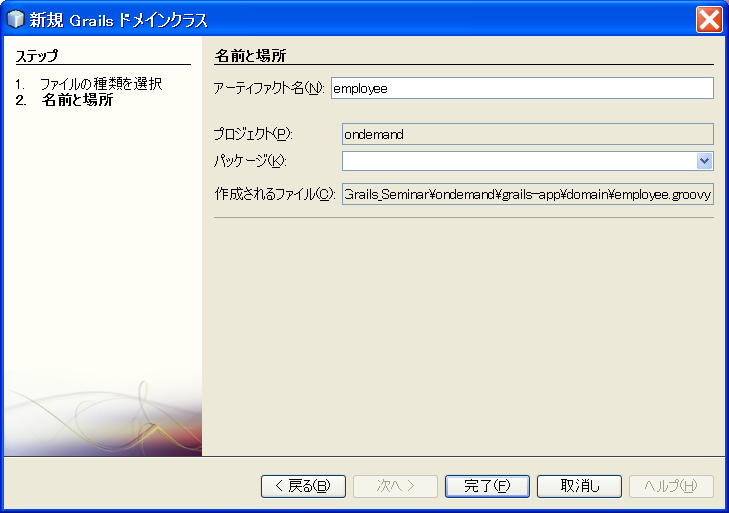
プロジェクト ondemandのドメインクラス にフォーカスを当てる >右クリック> 新規>Grails ドメインクラス でマウスクリック

アーティファクト名(N)フィールドに"employee"と入力して完了ボタンを押します。
NetBeans の 出力エリアには次のログが見えます。
出力 - ondemand (create-domain-class)
Welcome to Grails 1.1.1 - http://grails.org/
Licensed under Apache Standard License 2.0
Grails home is set to: C:\grails-1.1.1
Base Directory: C:\AnetBeans6.7M2\Grails_Seminar\ondemand
Running script C:\grails-1.1.1\scripts\CreateDomainClass.groovy
Environment set to development
Created DomainClass for Employee
Created Tests for Employee
|
次に、ドメインクラスのEmployeeに2つのプロパティを追加します。すなわちfullname 、usernameで両方ともStringです。
class Employee {

    String fullname
    String username

    static constraints = {
    }
}
$ grails create-zul employee
の所は NetBeans
においては
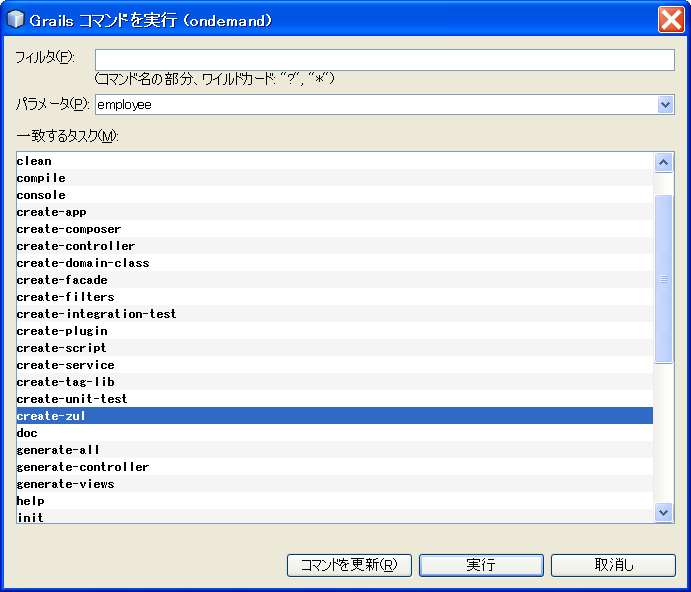
プロジェクト ondemand にフォーカスを当てる >右クリック> Grails コマンドを実行>マウスクリック
カーソルを create-zul まで持って行き、パラメータ(P) フィールドに employee と入力して実行ボタンを押します。
このコマンドでgrails-apps/composers/EmployeeComposer.groovyも作成されます。
NetBeans の 出力エリアには次のログが見えます。
出力 - ondemand (create-zul)
Welcome to Grails 1.1.1 - http://grails.org/
Licensed under Apache Standard License 2.0
Grails home is set to: C:\grails-1.1.1
Base Directory: C:\AnetBeans6.7M2\Grails_Seminar\ondemand
Running script C:\Documents and Settings\training1\.grails\1.1.1\projects\ondemand\plugins\zk-0.7.2\scripts\CreateZul.groovy
Environment set to development
[copy] Copying 1 file to C:\AnetBeans6.7M2\Grails_Seminar\ondemand\web-app
[mkdir] Created dir: C:\AnetBeans6.7M2\Grails_Seminar\ondemand\grails-app\composers
Created Composer for Employee
|
employee.zulの編集
<window apply="${employeeComposer}">

    <vbox>
        <image src="images/grails_logo.jpg"/>
    </vbox>

    <listbox id="lstEmployee" width="100%" checkmark="true">
        <listhead sizable="true">
            <listheader label="ID" sort="auto" />
            <listheader label="Full Name" sort="auto" />
            <listheader label="User Name" sort="auto" />
        </listhead>
  </listbox>
  <paging id="pagEmployee" pageSize="30" />

</window>
このコードでは、 2のプロパティlstEmployee 、 pagEmployeeを見ることができます 。
どちらもGenericForwardComposerのサブクラスで、GrailsComposer により注入されています 。
それらは、明らかに、 zulファイルにおけるリストボックスとページングコンポーネントを表しています。
そこにはafterCompose クロージャも見えます 。
このクロージャはdoAfterComposeによって起動され、そこでコンポーネントを初期化するGroovyが動作します。
アクティブなページを更新する為にpagEmployeeをクリックする度に自動イベントハンドラonPaging_pagEmployeeがコールされます。
ハンドラが動作するにはハンドラの唯一の引数はForwardEventもしくはEventでなければならない事に注意。
redrawメソッドにおいて宣言される、Groovyのデフォルト引数の使用例をお見せしましょう。
それは、 afterCompose 内でredraw()をコールすることですが、redraw(0)を意味します 。
また、 redraw メソッドにはZKGrails によって追加される動的メソッドを使用するところが2ヶ所あります。
最初の1つは listbox#clear ですべての ListItem を削除します。
2つ目は append で、 ZK Builderを介してのコンポーネントを構築を受け付けています。
import org.zkoss.zkgrails.*
import org.zkoss.zk.ui.event.*

class EmployeeComposer extends GrailsComposer {

    def lstEmployee
    def pagEmployee

    def afterCompose = { c ->
        pagEmployee.totalSize = Employee.count()
        redraw()
    }

    def onPaging_pagEmployee(ForwardEvent fe) {
        def e = fe.origin
        redraw(e.activePage)
    }

    def redraw(page=0) {
        def list = Employee.list(offset: page * pagEmployee.pageSize,
                                 max: pagEmployee.pageSize)

        lstEmployee.clear()
        lstEmployee.append {
            list.each { e ->
                listitem(value: e) {
                    listcell(label: e.id)
                    listcell(label: e.fullname)
                    listcell(label: e.username)
                }
            }
        }
    }

}
アプリケーションを実行する前に、いくつかの試験データを表示する必要があります。
grails-app/conf/BootStrap.groovy オープンし、 initのクロージャに、次のスニペットを追加します。
     def init = { servletContext ->
        1000.times { i ->
            new Employee(fullname: "Name $i", username: "user$i").save()
        }
     }
上記のコードでは、1000個のドメインオブジェクトクラス Employee を作成するために、1000回ループします 。
アプリケーションを実行します
$ grails run-app
の所は NetBeans
においては
プロジェクト ondemand にフォーカスを当てる >右クリック>実行>マウスクリック
でアプリケーションの実行が出来ます。
プロジェクトを主プロジェクトに設定してあるならば、ツールバーの実行ボタン(緑の三角ボタン)も同じことです。
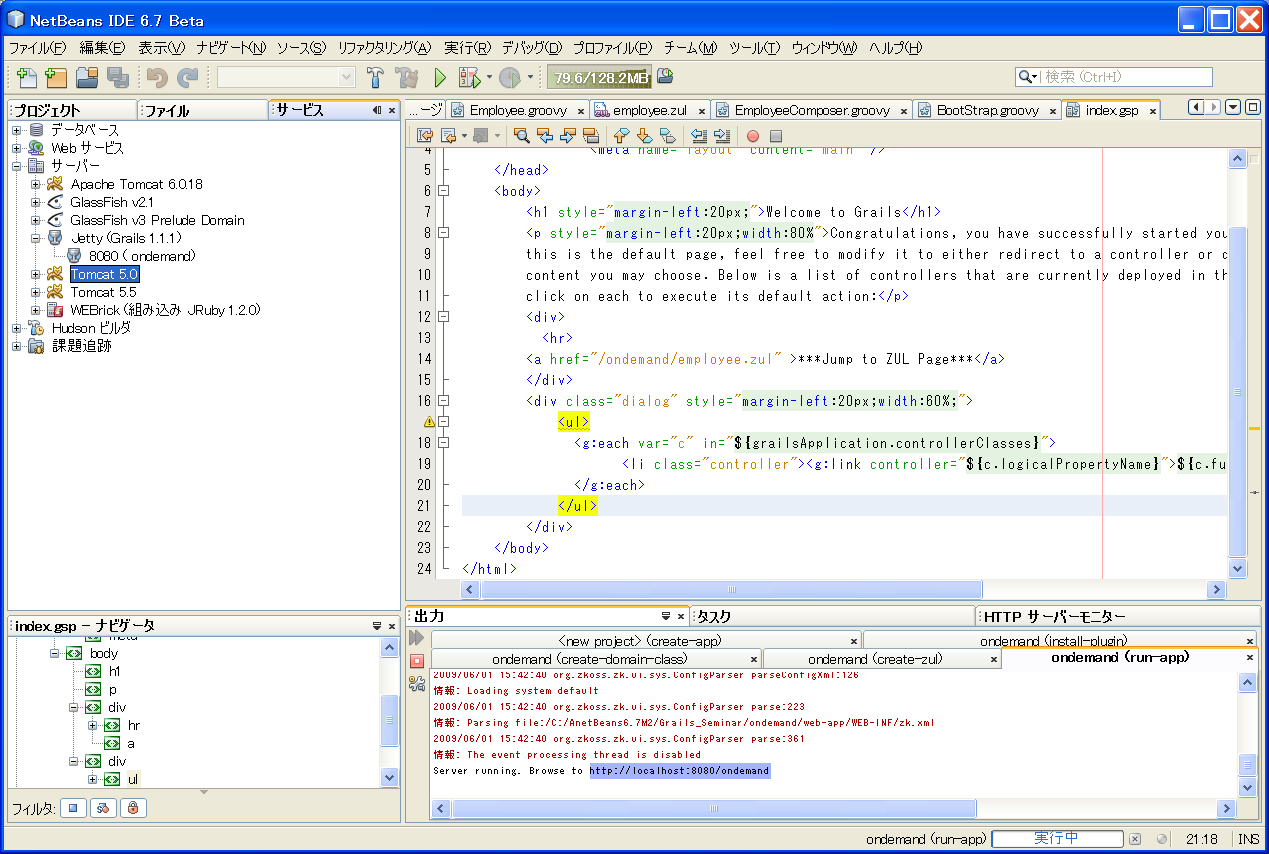
NetBeans の 出力エリアには次のログが見えます。
出力 - ondemand (run-app)
Welcome to Grails 1.1.1 - http://grails.org/
Licensed under Apache Standard License 2.0
Grails home is set to: C:\grails-1.1.1
Base Directory: C:\AnetBeans6.7M2\Grails_Seminar\ondemand
Running script C:\grails-1.1.1\scripts\RunApp.groovy
Environment set to development
[copy] Copied 3 empty directories to 2 empty directories under C:\Documents and Settings\training1\.grails\1.1.1\projects\ondemand\resources
[copy] Copied 1 empty directory to 1 empty directory under C:\Documents and Settings\training1\.grails\1.1.1\projects\ondemand\resources
[mkdir] Created dir: C:\Documents and Settings\training1\.grails\1.1.1\projects\ondemand\classes
[groovyc] Compiling 13 source files to C:\Documents and Settings\training1\.grails\1.1.1\projects\ondemand\classes
[groovyc] Compiling 8 source files to C:\Documents and Settings\training1\.grails\1.1.1\projects\ondemand\classes
[mkdir] Created dir: C:\Documents and Settings\training1\.grails\1.1.1\projects\ondemand\resources\grails-app\i18n
[native2ascii] Converting 11 files from C:\AnetBeans6.7M2\Grails_Seminar\ondemand\grails-app\i18n to C:\Documents and Settings\training1\.grails\1.1.1\projects\ondemand\resources\grails-app\i18n
[copy] Copying 1 file to C:\Documents and Settings\training1\.grails\1.1.1\projects\ondemand\classes
[copy] Copied 2 empty directories to 2 empty directories under C:\Documents and Settings\training1\.grails\1.1.1\projects\ondemand\resources
Running Grails application..
2009/06/01 15:42:40 org.zkoss.zk.ui.http.WebManager <init>:112
情報: Starting ZK 3.6.1 (build: 09050418)
2009/06/01 15:42:40 org.zkoss.zk.ui.sys.ConfigParser parseConfigXml:126
情報: Loading system default
2009/06/01 15:42:40 org.zkoss.zk.ui.sys.ConfigParser parse:223
情報: Parsing file:/C:/AnetBeans6.7M2/Grails_Seminar/ondemand/web-app/WEB-INF/zk.xml
2009/06/01 15:42:40 org.zkoss.zk.ui.sys.ConfigParser parse:361
情報: The event processing thread is disabled
Server running. Browse to http://localhost:8080/ondemand
|
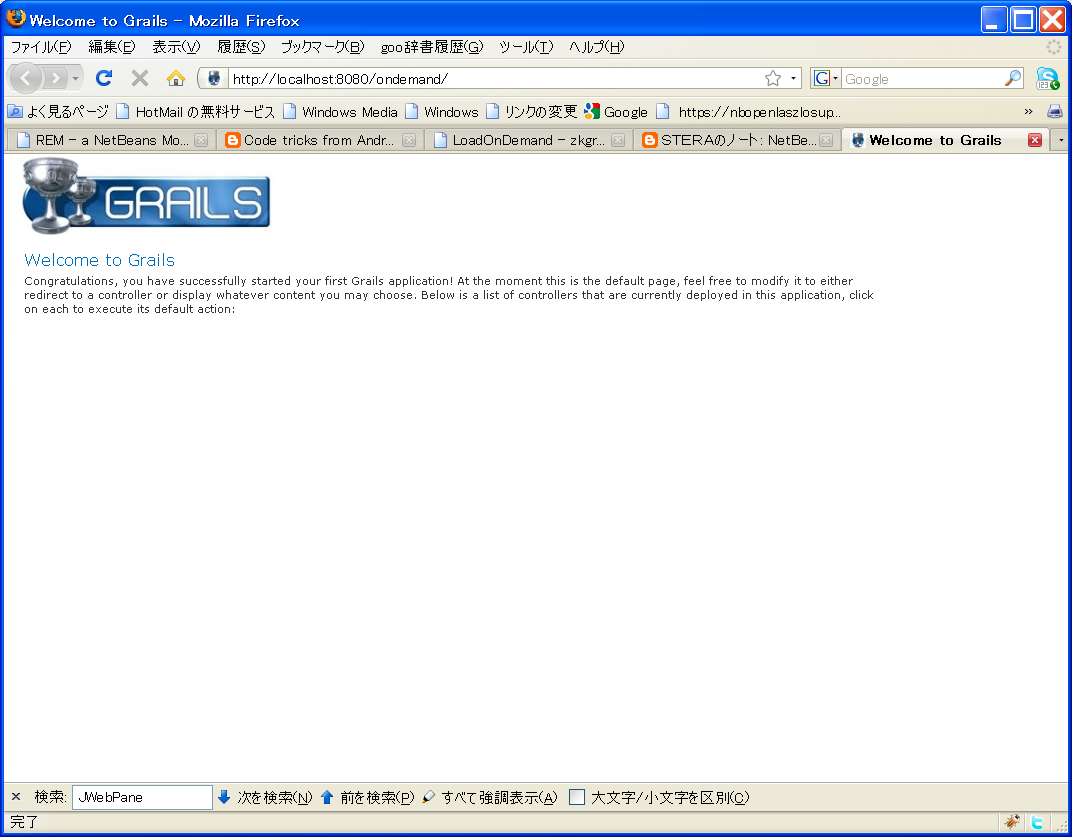
NetBeans でWebアプリプロジェクトを起動すると、URL: http://localhost:8080/ondemand で
自動的にブラウザも起動します。
起動時のコンテキストの指定はできません。
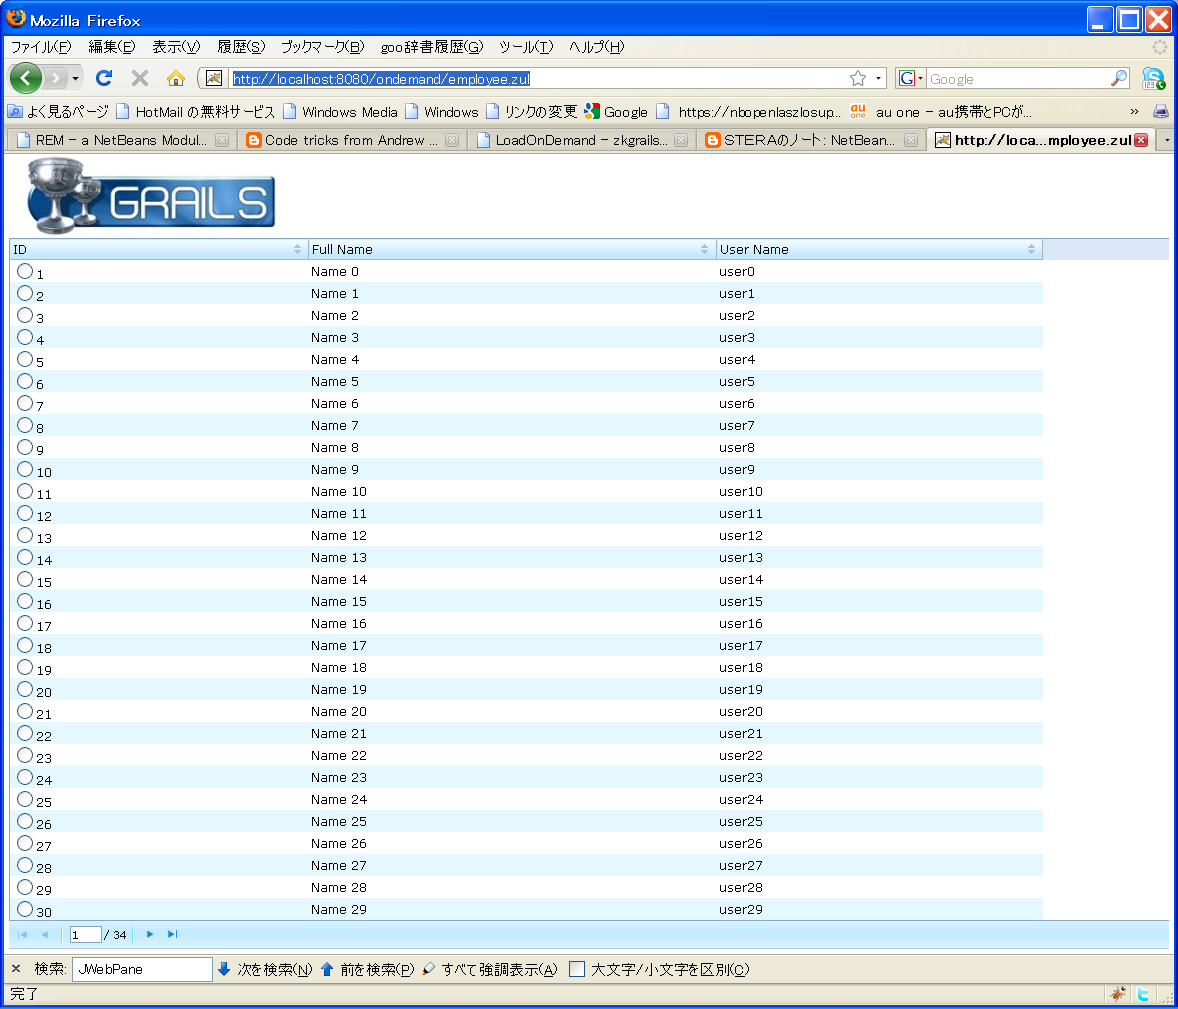
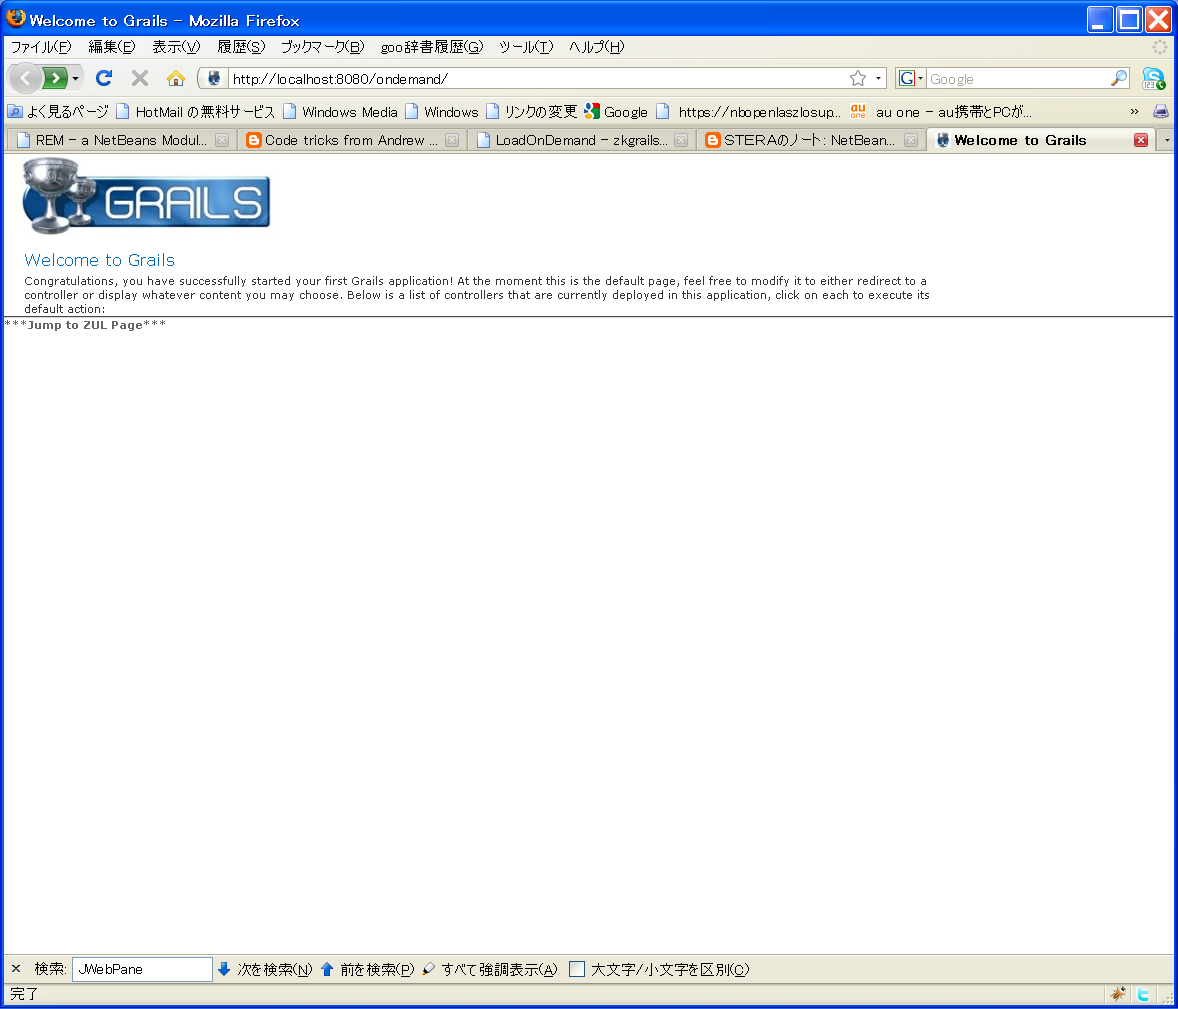
ここでブラウザでURLを"http://localhost:8080/ondemand/employee.zul"に変更してやると、Grailsのコンテンツを
ZKGrailsのViewで表現したものが見えます。
ここで、デフォルトで作成される、grails-app/view/index.gsp
の<body>部分を次のように修正してやると、
     <body>
        <h1 style="margin-left:20px;">Welcome to Grails</h1>
        <p style="margin-left:20px;width:80%">Congratulations, you have successfully started your first Grails application! At the moment
        this is the default page, feel free to modify it to either redirect to a controller or display whatever
        content you may choose. Below is a list of controllers that are currently deployed in this application,
        click on each to execute its default action:</p>
        <div>
          <hr>
        <a href="/ondemand/employee.zul" >***Jump to ZUL Page***</a>
        </div>
        <div class="dialog" style="margin-left:20px;width:60%;">
            <ul>
              <g:each var="c" in="${grailsApplication.controllerClasses}">
                    <li class="controller"><g:link controller="${c.logicalPropertyName}">${c.fullName}</g:link></li>
              </g:each>
            </ul>
        </div>
    </body>
GSPページからZULページへのリンクができます。
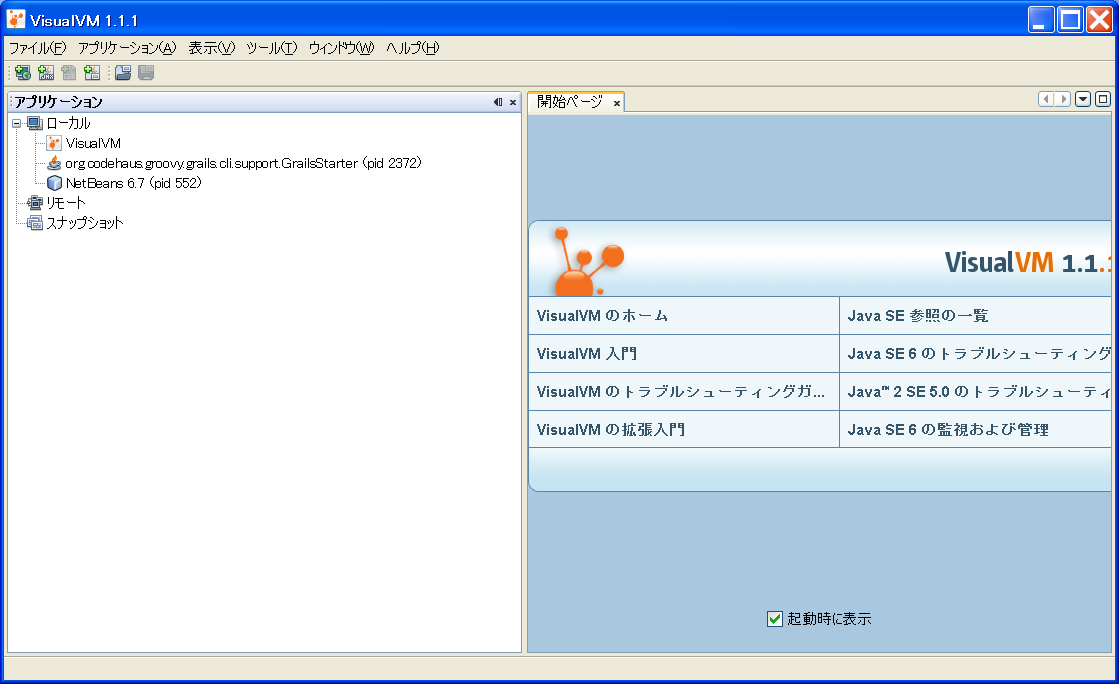
ここで、一息入れてアプリケーションサーバーの方はどうなっているのでしょうか?
NetBeansのタブをプロジェクトからサービスに切り替えますと、アプリケーションサーバーの状態が見えます。
Jetty がポート8080で動作していることがわかります。
NetBeans 側から Jetty を停止できます。(出来ないことも時々発生します)
こんなときに登場するのが、冒頭に述べました VisualVM の登場です。
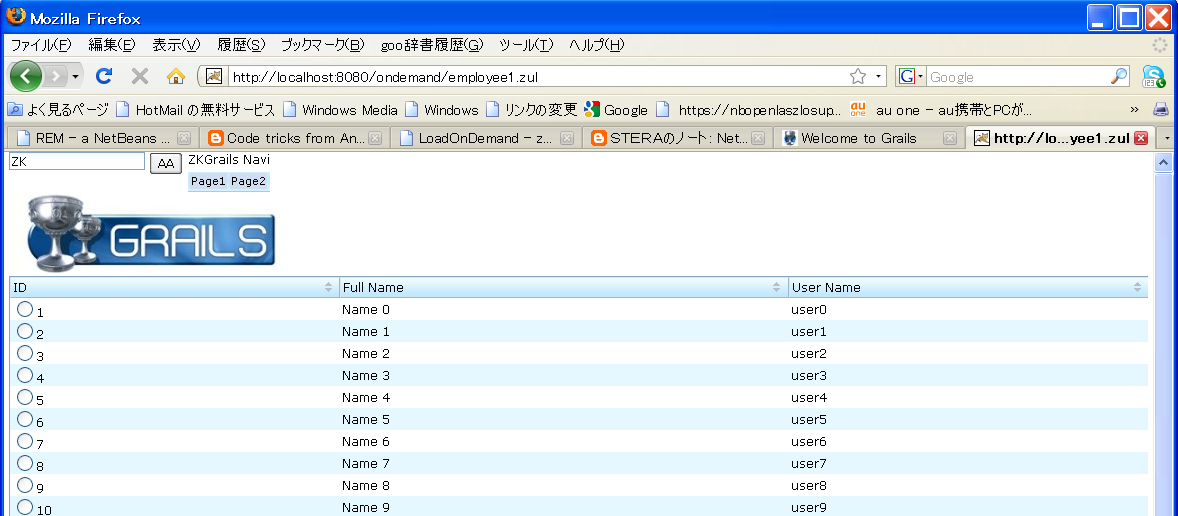
 これから先は、ZK のRich な面を見てゆきましょう。
現在動作しているページ employee.zul のコピーを作成して、それに対して修正を加えます。
コピーすると名称の最後に"_n"が付加されます。nは自動的に加算されます。
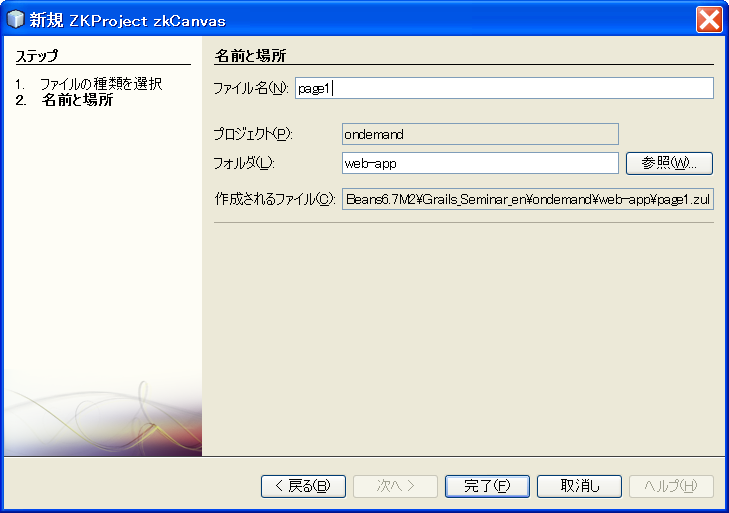
今回は"employee_1.zul"となりますので、"employee1.zul"と修正してやり、このページを対象とします。
"employee1.zul"内に<hbox>を挿入し、そこに <textbox value="ZKGrails"/> を挿入して
プロジェクトを起動して、確認します。
更に <button label="AA" onClick=""/>を追加して確認します。
ページの追加や修正に対してはサイドデプロイする必要はありません。
これから先は、ZK のRich な面を見てゆきましょう。
現在動作しているページ employee.zul のコピーを作成して、それに対して修正を加えます。
コピーすると名称の最後に"_n"が付加されます。nは自動的に加算されます。
今回は"employee_1.zul"となりますので、"employee1.zul"と修正してやり、このページを対象とします。
"employee1.zul"内に<hbox>を挿入し、そこに <textbox value="ZKGrails"/> を挿入して
プロジェクトを起動して、確認します。
更に <button label="AA" onClick=""/>を追加して確認します。
ページの追加や修正に対してはサイドデプロイする必要はありません。
最終的に、下記のようなコードをパレットを利用しながら
<window apply="${employeeComposer}">
の下に追加します。
<hbox>
<textbox value="ZK"/>
<button label="AA" onClick=""/>
<vbox>
<label value="ZKGrails Navi" id="ZKGrails" />
<toolbar>
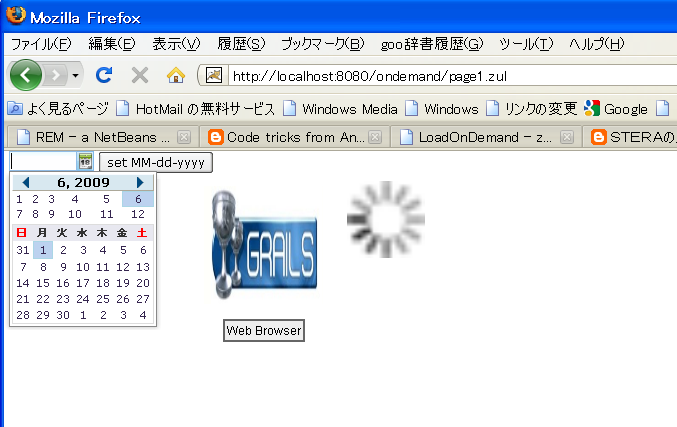
<toolbarbutton label="Page1" href="page1.zul"/>
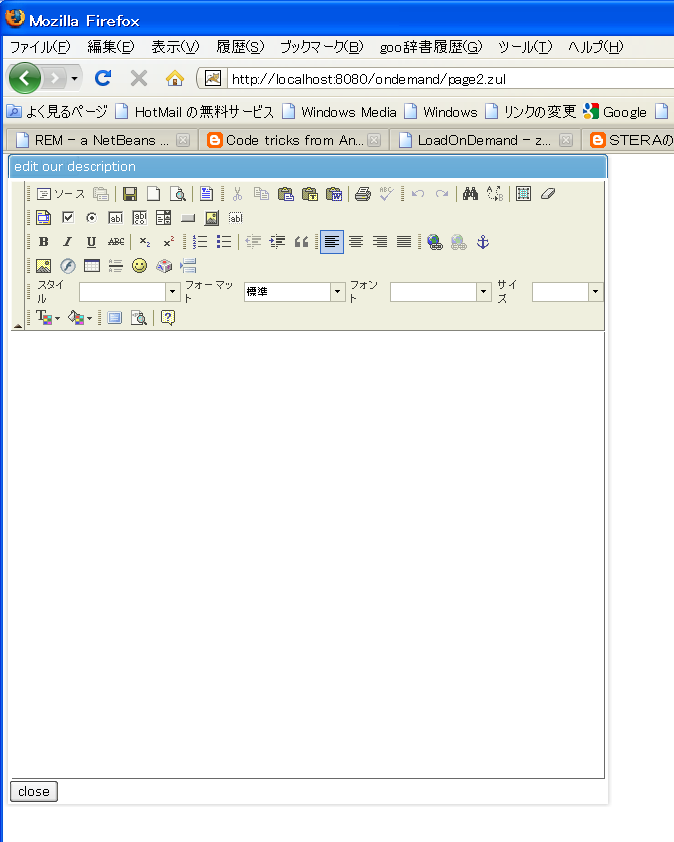
<toolbarbutton label="Page2" href="page2.zul"/>
</toolbar>
</vbox>
</hbox>
|