|
This is a ZKGrails port of the program written in http://docs.zkoss.org/wiki/Use_Load-On-Demand_to_Handle_Huge_Data.
This tutorial is working for ZKGrails 0.7.1 and later.
This tutorial is modified to run on NetBeans.
Original: Chanwit Kaewkasi
_
First of this tutorial
Before creating Grails Project using NetBeans,I will introduce to you some trouble about Jetty (AppServer of Grails)
and a Know How to solve this issue.
Please look this BLOG.
Stop Jetty Server using "Java VisualVM" and "TASKKILL"
Preparation for Grails project:
Get Grails1.1.1 and install in Windows.
Then we setup environment of IDE by next operation:
Tool > Option > Others > Miscellaneous > Grooby

Set the previously installed Grails1.1.1 directory to Grails HOME.

Command LINE Base: $ grails create-app ondemand
NetBeans Base:
Select File > New Project > Groovy > Grails Application > Click Next

Then type "ondemand" in Project Name Field,then click Finish.

We can see next log on IDE's Output area.
Output - <new project>(create-app)
Welcome to Grails 1.1.1 - http://grails.org/
Licensed under Apache Standard License 2.0
Grails home is set to: C:\grails-1.1.1
Base Directory: C:\AnetBeans6.7M2\Grails_Seminar_en
Running script C:\grails-1.1.1\scripts\CreateApp_.groovy
Environment set to development
Setting non-interactive mode
[mkdir] Created dir: C:\AnetBeans6.7M2\Grails_Seminar_en\ondemand\src
[mkdir] Created dir: C:\AnetBeans6.7M2\Grails_Seminar_en\ondemand\src\java
[mkdir] Created dir: C:\AnetBeans6.7M2\Grails_Seminar_en\ondemand\src\groovy
[mkdir] Created dir: C:\AnetBeans6.7M2\Grails_Seminar_en\ondemand\grails-app
[mkdir] Created dir: C:\AnetBeans6.7M2\Grails_Seminar_en\ondemand\grails-app\controllers
[mkdir] Created dir: C:\AnetBeans6.7M2\Grails_Seminar_en\ondemand\grails-app\services
[mkdir] Created dir: C:\AnetBeans6.7M2\Grails_Seminar_en\ondemand\grails-app\domain
[mkdir] Created dir: C:\AnetBeans6.7M2\Grails_Seminar_en\ondemand\grails-app\taglib
[mkdir] Created dir: C:\AnetBeans6.7M2\Grails_Seminar_en\ondemand\grails-app\utils
[mkdir] Created dir: C:\AnetBeans6.7M2\Grails_Seminar_en\ondemand\grails-app\views
[mkdir] Created dir: C:\AnetBeans6.7M2\Grails_Seminar_en\ondemand\grails-app\views\layouts
[mkdir] Created dir: C:\AnetBeans6.7M2\Grails_Seminar_en\ondemand\grails-app\i18n
[mkdir] Created dir: C:\AnetBeans6.7M2\Grails_Seminar_en\ondemand\grails-app\conf
[mkdir] Created dir: C:\AnetBeans6.7M2\Grails_Seminar_en\ondemand\test
[mkdir] Created dir: C:\AnetBeans6.7M2\Grails_Seminar_en\ondemand\test\unit
[mkdir] Created dir: C:\AnetBeans6.7M2\Grails_Seminar_en\ondemand\test\integration
[mkdir] Created dir: C:\AnetBeans6.7M2\Grails_Seminar_en\ondemand\scripts
[mkdir] Created dir: C:\AnetBeans6.7M2\Grails_Seminar_en\ondemand\web-app
[mkdir] Created dir: C:\AnetBeans6.7M2\Grails_Seminar_en\ondemand\web-app\js
[mkdir] Created dir: C:\AnetBeans6.7M2\Grails_Seminar_en\ondemand\web-app\css
[mkdir] Created dir: C:\AnetBeans6.7M2\Grails_Seminar_en\ondemand\web-app\images
[mkdir] Created dir: C:\AnetBeans6.7M2\Grails_Seminar_en\ondemand\web-app\META-INF
[mkdir] Created dir: C:\AnetBeans6.7M2\Grails_Seminar_en\ondemand\lib
[mkdir] Created dir: C:\AnetBeans6.7M2\Grails_Seminar_en\ondemand\grails-app\conf\spring
[mkdir] Created dir: C:\AnetBeans6.7M2\Grails_Seminar_en\ondemand\grails-app\conf\hibernate
[propertyfile] Creating new property file: C:\AnetBeans6.7M2\Grails_Seminar_en\ondemand\application.properties
[copy] Copying 1 resource to C:\AnetBeans6.7M2\Grails_Seminar_en\ondemand
[unjar] Expanding: C:\AnetBeans6.7M2\Grails_Seminar_en\ondemand\grails-shared-files.jar into C:\AnetBeans6.7M2\Grails_Seminar_en\ondemand
[delete] Deleting: C:\AnetBeans6.7M2\Grails_Seminar_en\ondemand\grails-shared-files.jar
[copy] Copying 1 resource to C:\AnetBeans6.7M2\Grails_Seminar_en\ondemand
[unjar] Expanding: C:\AnetBeans6.7M2\Grails_Seminar_en\ondemand\grails-app-files.jar into C:\AnetBeans6.7M2\Grails_Seminar_en\ondemand
[delete] Deleting: C:\AnetBeans6.7M2\Grails_Seminar_en\ondemand\grails-app-files.jar
[move] Moving 1 file to C:\AnetBeans6.7M2\Grails_Seminar_en\ondemand
[move] Moving 1 file to C:\AnetBeans6.7M2\Grails_Seminar_en\ondemand
[move] Moving 1 file to C:\AnetBeans6.7M2\Grails_Seminar_en\ondemand
Installing plug-in hibernate-1.1.1
[delete] Deleting directory C:\Documents and Settings\training1\.grails\1.1.1\projects\ondemand\plugins\hibernate-1.1.1
[mkdir] Created dir: C:\Documents and Settings\training1\.grails\1.1.1\projects\ondemand\plugins\hibernate-1.1.1
[unzip] Expanding: C:\Documents and Settings\training1\.grails\1.1.1\plugins\grails-hibernate-1.1.1.zip into C:\Documents and Settings\training1\.grails\1.1.1\projects\ondemand\plugins\hibernate-1.1.1
Executing hibernate-1.1.1 plugin post-install script ...
Plugin hibernate-1.1.1 installed
Created Grails Application at C:\AnetBeans6.7M2\Grails_Seminar_en/ondemand
|
Project on NetBeans looks like below:

Next, you need to install ZKGrails. The latest version will be installed automatically.
Command LINE Base: $ grails install-plugin zk
NetBeans Base:
Set focus on Project "ondemand" > right-click > move cursor to "Run Grails Command"

Click Mouse on "Run Grails Command"
Then move cursor to "install-plugin", input "zk" in the Parameters field, then click Run.

We can see next log on IDE's Output area.
Output - <ondemand (install-plugin)
Welcome to Grails 1.1.1 - http://grails.org/
Licensed under Apache Standard License 2.0
Grails home is set to: C:\grails-1.1.1
Base Directory: C:\AnetBeans6.7M2\Grails_Seminar_en\ondemand
Running script C:\grails-1.1.1\scripts\InstallPlugin.groovy
Environment set to development
Reading remote plugin list ...
Reading remote plugin list ...
Plugin list out-of-date, retrieving..
[delete] Deleting: C:\Documents and Settings\training1\.grails\1.1.1\plugins-list-default.xml
[get] Getting: http://plugins.grails.org/.plugin-meta/plugins-list.xml
[get] To: C:\Documents and Settings\training1\.grails\1.1.1\plugins-list-default.xml
...............................................................
[get] last modified = Tue Jun 02 01:30:38 JST 2009
Installing plug-in zk-0.7.2
You currently already have a version of the plugin installed [zk-0.7.2]. Do you want to upgrade this version? (y, n)
y
[delete] Deleting directory C:\Documents and Settings\training1\.grails\1.1.1\projects\ondemand\plugins\zk-0.7.2
[mkdir] Created dir: C:\Documents and Settings\training1\.grails\1.1.1\projects\ondemand\plugins\zk-0.7.2
[unzip] Expanding: C:\Documents and Settings\training1\.grails\1.1.1\plugins\grails-zk-0.7.2.zip into C:\Documents and Settings\training1\.grails\1.1.1\projects\ondemand\plugins\zk-0.7.2
Executing zk-0.7.2 plugin post-install script ...
[copy] Copying 1 file to C:\AnetBeans6.7M2\Grails_Seminar_en\ondemand\web-app\WEB-INF
Plugin zk-0.7.2 installed
Plug-in provides the following new scripts:
------------------------------------------
grails create-composer
grails create-facade
grails create-zul
|
Here,we confirm that the plugin is installed.
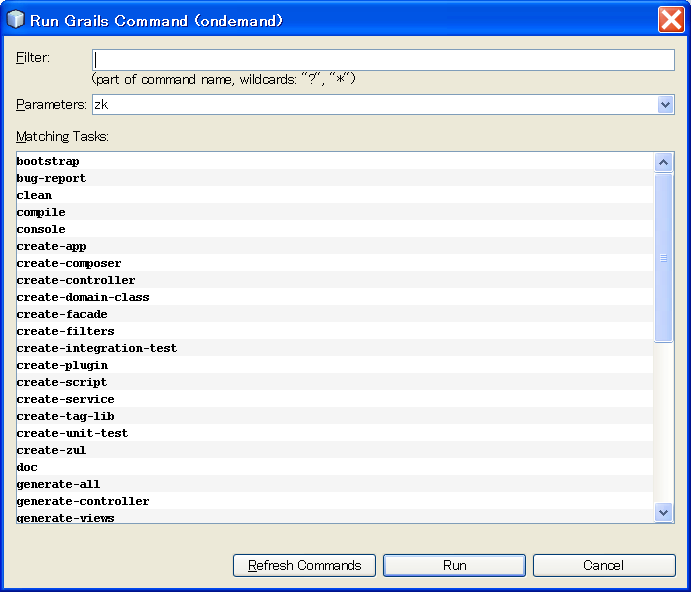
Again we make this operation: Set focus on Project "ondemand" > right-click > move cursor to "Run Grails Command"
then we can confirm that next 3 commands (grails create-composer,
grails create-facade,
grails create-zul) is added.
If not so,please push
Refresh Commands button.

We are going to demonstrate with a simple domain class, Employee.
To create domain class in Grails, simply use the command create-domain-class, following by your class name:
Command LINE Base: $ grails create-domain-class employee
NetBeans Base:
Set focus on Project's "Domain Class" > right-click > new > move cursor to "Grails Domain Class"

Click mouse,then type "employee" in Artifact Name Field,then push Finish.

We can see next log on IDE's Output area.
Output - ondemand (create-domain-class)
Welcome to Grails 1.1.1 - http://grails.org/
Licensed under Apache Standard License 2.0
Grails home is set to: C:\grails-1.1.1
Base Directory: C:\AnetBeans6.7M2\Grails_Seminar_en\ondemand
Running script C:\grails-1.1.1\scripts\CreateDomainClass.groovy
Environment set to development
Created DomainClass for Employee
Created Tests for Employee
|
We then add two properties into domain class Employee, namely fullname and username. Both are string.
class Employee {

    String fullname
    String username

    static constraints = {
    }
}
Command LINE Base: $ grails create-zul employee
NetBeans Base:
Set focus on Project "ondemand" > right-click > move cursor to "Run Grails Command"
Click Mouse on "Run Grails Command"
Then move cursor to "create-zul", input "employee" in the Parameters field, then click Run.

This will also create grails-apps/composers/EmployeeComposer.groovy for you.
We can see next log on IDE's Output area.
Output - ondemand (create-zul)
Welcome to Grails 1.1.1 - http://grails.org/
Licensed under Apache Standard License 2.0
Grails home is set to: C:\grails-1.1.1
Base Directory: C:\AnetBeans6.7M2\Grails_Seminar_en\ondemand
Running script C:\Documents and Settings\training1\.grails\1.1.1\projects\ondemand\plugins\zk-0.7.2\scripts\CreateZul.groovy
Environment set to development
[copy] Copying 1 file to C:\AnetBeans6.7M2\Grails_Seminar_en\ondemand\web-app
[mkdir] Created dir: C:\AnetBeans6.7M2\Grails_Seminar_en\ondemand\grails-app\composers
Created Composer for Employee
|
<window apply="${employeeComposer}">

    <vbox>
        <image src="images/grails_logo.jpg"/>
    </vbox>

    <listbox id="lstEmployee" width="100%" checkmark="true">
        <listhead sizable="true">
            <listheader label="ID" sort="auto" />
            <listheader label="Full Name" sort="auto" />
            <listheader label="User Name" sort="auto" />
        </listhead>
  </listbox>
  <paging id="pagEmployee" pageSize="30" />

</window>
From the code, you may see 2 properties lstEmployee, and pagEmployee.
Both are injected by GrailsComposer, which is a subclass of GenericForwardComposer.
They, apparently, represents listbox and paging components from your .zul file.
You may notice that there is afterCompose closure.
This closure is run by doAfterCompose, and it's a Groovy place to initialize your components.
The auto-wired event handle onPaging_pagEmployee will be called everytime you click pagEmployee to change the active page.
Note that, the only argument of the handler must be ForwardEvent or Event to make it work.
I also show you the use of Groovy's default argument value declared at redraw method.
That is, calling redraw() in afterCompose means redraw(0).
Also in redraw method, there are two places to use dynamic methods added by ZKGrails.
The first one is listbox#clear, of which removes all listitem.
The second one is append, which accepts component construction via ZK Builder.
import org.zkoss.zkgrails.*
import org.zkoss.zk.ui.event.*

class EmployeeComposer extends GrailsComposer {

    def lstEmployee
    def pagEmployee

    def afterCompose = { c ->
        pagEmployee.totalSize = Employee.count()
        redraw()
    }

    def onPaging_pagEmployee(ForwardEvent fe) {
        def e = fe.origin
        redraw(e.activePage)
    }

    def redraw(page=0) {
        def list = Employee.list(offset: page * pagEmployee.pageSize,
                                 max: pagEmployee.pageSize)

        lstEmployee.clear()
        lstEmployee.append {
            list.each { e ->
                listitem(value: e) {
                    listcell(label: e.id)
                    listcell(label: e.fullname)
                    listcell(label: e.username)
                }
            }
        }
    }

}
Before getting your application run, you need some testing data to show.
Open grails-app/conf/BootStrap.groovy, and then add the following snippet into init closure.
     def init = { servletContext ->
        1000.times { i ->
            new Employee(fullname: "Name $i", username: "user$i").save()
        }
     }
With the above code, we loop 1,000 times to create 1,000 domain objects of class Employee.
Command LINE Base: $ grails run-app
NetBeans Base:
Set focus on Project "ondemand" > right-click > move cursor to "Run" > click mouse
If Project is set to Main project,then it is equivalent to push Run Button(Green 3angle button).
We can see next log on IDE's Output area.
Output - ondemand (run-app)
Welcome to Grails 1.1.1 - http://grails.org/
Licensed under Apache Standard License 2.0
Grails home is set to: C:\grails-1.1.1
Base Directory: C:\AnetBeans6.7M2\Grails_Seminar_en\ondemand
Running script C:\grails-1.1.1\scripts\RunApp.groovy
Environment set to development
[groovyc] Compiling 4 source files to C:\Documents and Settings\training1\.grails\1.1.1\projects\ondemand\classes
[copy] Copying 1 file to C:\Documents and Settings\training1\.grails\1.1.1\projects\ondemand\classes
Running Grails application..
Jun 3, 2009 1:49:14 PM org.zkoss.zk.ui.http.WebManager <init>:112
INFO: Starting ZK 3.6.1 (build: 09050418)
Jun 3, 2009 1:49:14 PM org.zkoss.zk.ui.sys.ConfigParser parseConfigXml:126
INFO: Loading system default
Jun 3, 2009 1:49:15 PM org.zkoss.zk.ui.sys.ConfigParser parse:223
INFO: Parsing file:/C:/AnetBeans6.7M2/Grails_Seminar_en/ondemand/web-app/WEB-INF/zk.xml
Jun 3, 2009 1:49:15 PM org.zkoss.zk.ui.sys.ConfigParser parse:361
INFO: The event processing thread is disabled
Server running. Browse to http://localhost:8080/ondemand |

When we run Web Application on NetBeans,then Web Browser is invoked automatically.
Start up context can not be set.
In this case,Browser is invoked on URL: http://localhost:8080/ondemand.
Here we change this URL
to http://localhost:8080/ondemand/employee.zul,
then,we see View of ZKVrails.

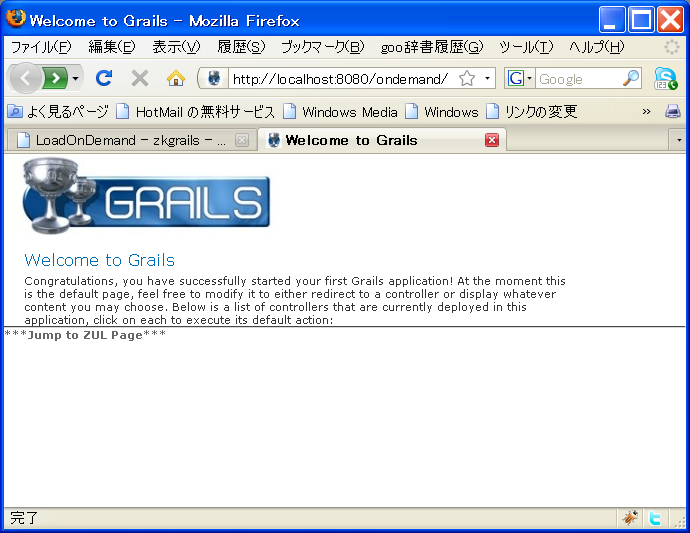
Here we apply change to <body> part of grails-app/view/index.gsp(generated by default)such as below.
     <body>
        <h1 style="margin-left:20px;">Welcome to Grails</h1>
        <p style="margin-left:20px;width:80%">Congratulations, you have successfully started your first Grails application! At the moment
        this is the default page, feel free to modify it to either redirect to a controller or display whatever
        content you may choose. Below is a list of controllers that are currently deployed in this application,
        click on each to execute its default action:</p>
        <div>
          <hr>
        <a href="/ondemand/employee.zul" >***Jump to ZUL Page***</a>
        </div>
        <div class="dialog" style="margin-left:20px;width:60%;">
            <ul>
              <g:each var="c" in="${grailsApplication.controllerClasses}">
                    <li class="controller"><g:link controller="${c.logicalPropertyName}">${c.fullName}</g:link></li>
              </g:each>
            </ul>
        </div>
    </body>
The link from GSP page to ZUL page.

Here,lets take a breath.
How is the application server going on?
When the tab of NetBeans is switched from the projects to service,
 the state of the application server is seen.


We see that Jetty is working on port 8080.
Normally we can stop Jetty from IDE side.
Sometimes it happen that we can not stop Jetty.
On this case,it is convenient to use VisualVM introduced at the top of this article.


From now on,we will look at the Rich presentation of "ZK".
We make copy of employee.zul and paste to Project on IDE.
Then employee_1.zul is created.
We rename this to mployee1.zul and make modification to this.
 It is convenient to use palette for modification.

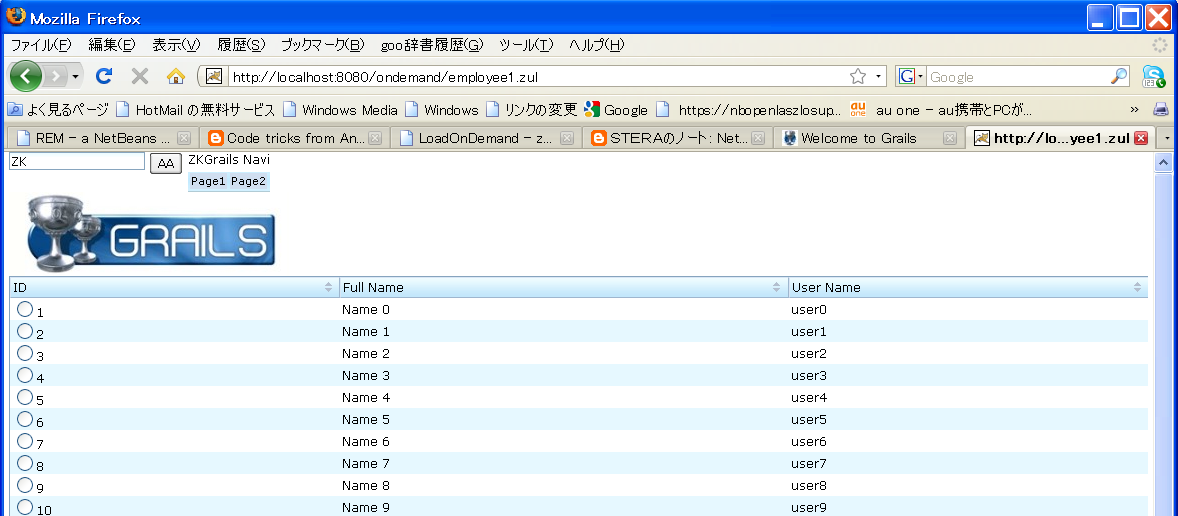
Insert <hbox> into this "employee1.zul" and insert <textbox value="ZK"/> into <hbox>.
We rerun Project and confirm the result.

Moreover we append <button label="AA" onClick=""/>,and confirm the result.
Addition of pages and modification of page is reflected without redeploy of Application Server.

Finally, we append this code seen below after
   <window apply="${employeeComposer}">
     <hbox>
            <textbox value="ZK"/>
            <button label="AA" onClick=""/>
            <vbox>
                <label value="ZKGrails Navi" id="ZKGrails" />
            <toolbar>
                <toolbarbutton label="Page1" href="page1.zul"/>
	    	<toolbarbutton label="Page2" href="page2.zul"/>
            </toolbar>
            </vbox>
        </hbox>

We made link to page1.zul and page2.zul on "employee1.zul" page.
Here,
we create page1.zul and page2.zul.
Set focus on Project's "Web Application " > right-click > new > move cursor to "Other"
Click Mouse on "Other"

|